Flash Drive Recovery Mac Free: How to Recover Files from Flash Drive Mac
 Jerry Cook
- Updated on 2019-12-04 to Mac Recovery
I have accidentally deleted some of my vacation photos from my USB flash drive. I need those photos immediately. I use the MacBook Air. Is there any way I can get those photos back?
Even though Mac is one of the most advanced and sophisticated Operating Systems in the world, users sometimes fail to understand its way of operating and fails to execute even the simple of tasks. It is very natural of accidentally deleting some files off your USB drive and there are ways to recover files from flash drive on Mac.
Being one of the top systems, Mac has its own data recovery utility but today we are going to focus on free 3rd party data recovery programs for Mac, these programs are better performing and easy to use. For further details, read the article below.
The Best Flash Drive Recovery Mac Software
There are numerous programs available on the internet able to recover files from flash drive Mac. But too many options have confused users since long. We have picked up the best flash drive recovery on Mac, that is UltFone Mac Data Recovery. This software is capable of recovering deleted files from flash drive on Mac with handy steps but high success rate. It supports all kinds of USB flash drives and the latest macOS Catalina.
So, let’s have a look how to use this program for flash drive recovery Mac. With the free version, you can scan and preview files on your flash drive.
-
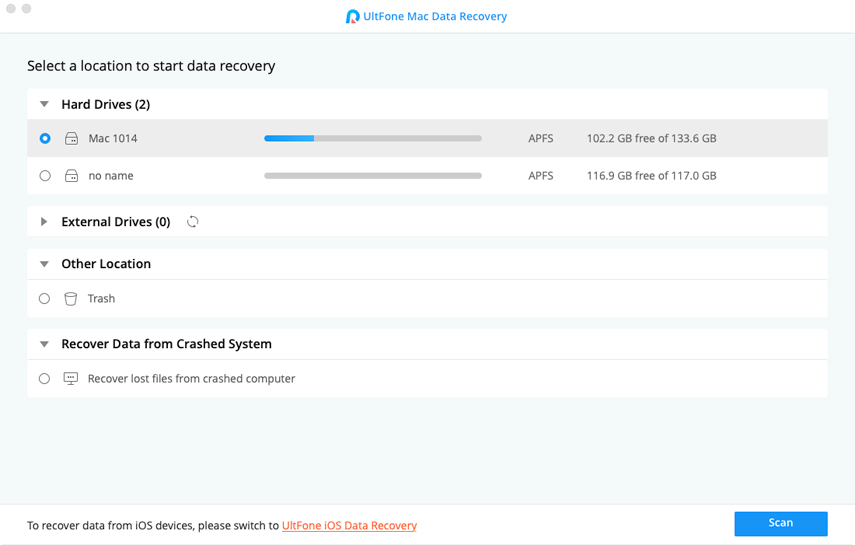
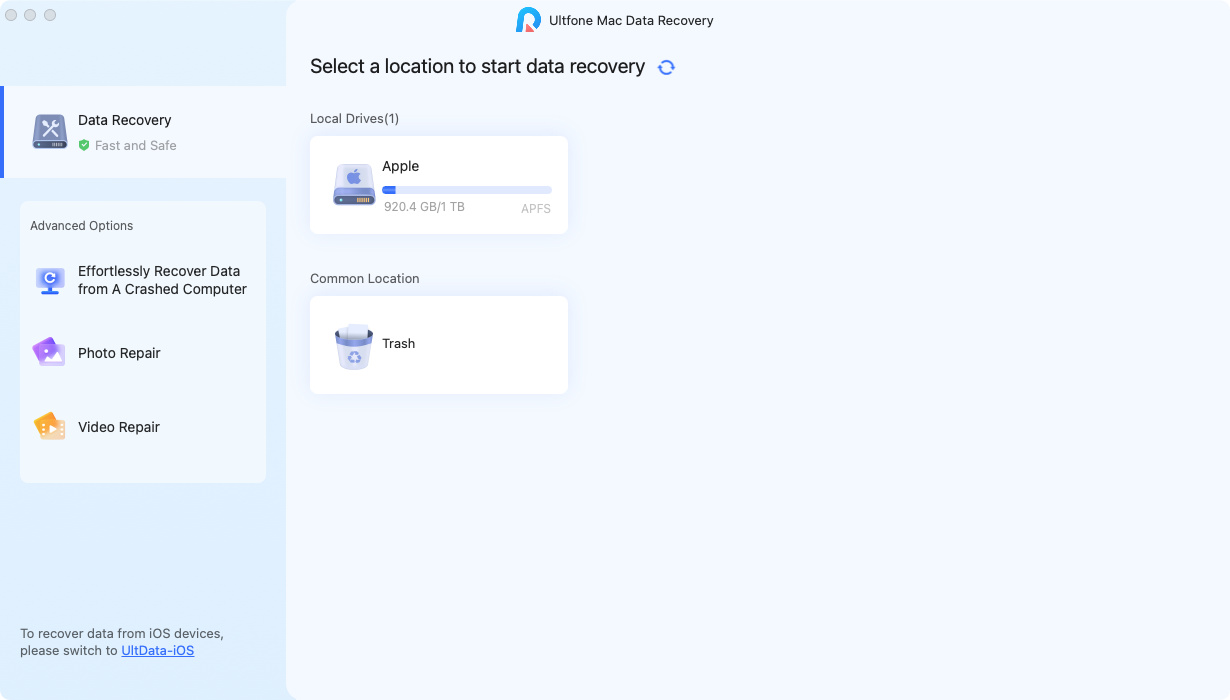
Step 1. At first you need to download and install the program on your Mac. Then, launch the program and it will detect all the hard drive partitions on your Mac. They will be displayed on the screen. After that, click on the USB drive and click “Scan” and initiate the recovery.

-
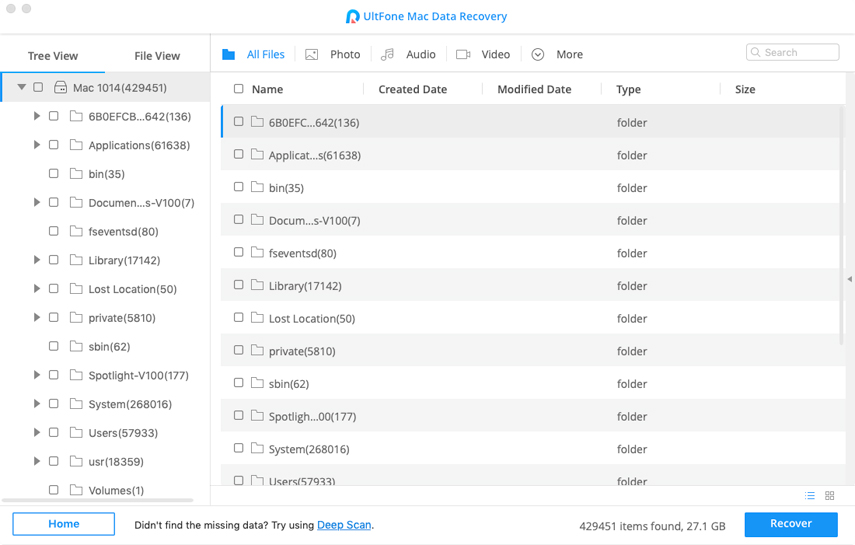
Step 2. After completing the scan, all the recoverable files will be displayed on the screen and they will be categorized.

-
Step 3. You can click on the files for additional details. Then, choose the files from the list and click on the “Recover” button. A prompt will pop-up where you have to choose a path for saving those files.

As you can see, this is the simplest way for flash drive data recovery on Mac and you also need to remember not to restore those files at the same place they were before the deletion.
Another Two Ways to Recover Deleted Files from Flash Drive Mac Free
Instead of using UltFone Mac Data Recovery, you can also try the other two free ways on how to make recovery flash drive for Mac.
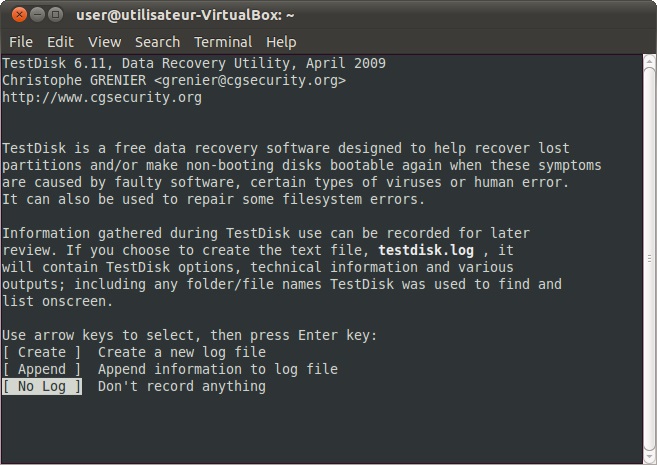
TestDisk is another great flash drive recovery Mac free program. This is very simple to use; let’s look at the steps below. Step 1. Open your Mac and launch the Terminal program. Step 2. After launching Terminal you need to input “sudo TestDisk” and initiate the data recovery by hitting “Enter”. Step 3. After that, select “No Log” and enter to continue. Step 4. The next step is to choose the folder/directory where your files were located before deletion. Use Up/Down arrow keys to navigate to the folder of your choice. Step 5. After that, select “EFI GPT”; if your Mac is older then you have to type “PPC Mac” and press Enter. Step 6. Next, select “Analyze” and hit “Enter” and the program will do a very quick search. PhotoRec is a very reliable data recovery tool; this tool allows the users to recover the different type of files including documents, photos, videos from different media. This is a very professional program to recover deleted files from flash drive on Mac. Let’s have a look at the steps. Step 2. But you need to run the program with Administrator access. Step 3. Then, use the Arrow keys to select the USB drive and hit “Enter”. Step 5. After that, choose the USB drive and you will have to provide details on the file system. Step 7. The next step is to choose the folder/directory where your files were located before deletion. Use Up/Down arrow keys to navigate to the folder of your choice. Way 1. Flash Drive Recovery Mac Free with TestDisk




Way 2. Flash Drive Recovery Mac Free using PhotoRec


Summary
Hence, all the free programs we discussed are very capable. They are able to recover all types of data on Mac. But the procedure provided by TestDisk and PhotoRec is just way too complicated for the comprehension of general users. So, we think it is best for you to go with UltFone Mac Data Recovery. This flash drive data recovery Mac software is effective and easier to use.

