UltFone Mac Data Recovery is a mighty tool to recover data from Mac hard drive, emptied Trash, external drive, or memory card. It is helpful when you deleted files accidentally or lost files after Mac hard drive is formatted, corrupted or dead. This application can also easily fix damaged or corrupt video/photo files and recover data from a crashed Mac by booting it up. With simple 3 steps, you can restore all lost files (photos, videos, mails, PDF, documents, RAR, etc.) from hard drive on macOS Ventura, macOS 12 Monterey, macOS 11 Big Sur, macOS 10.15 Catalina, macOS 10.14 Mojave, macOS 10.13 High Sierra, macOS 10.12 Sierra, macOS 10.11 Yosemite, macOS 10.10 El Capitan. Read on and check how to recover Mac deleted files with this Mac data recovery software.
Part 1 Recover from Hard Drives
Step 1 Select a Mac Hard Drive to Start
Launch UltFone Mac Data Recovery after installation. This application automatically recognizes and lists every hard drives/partitions on this Mac. Select a local drive and click Scan to start looking for all the lost data.
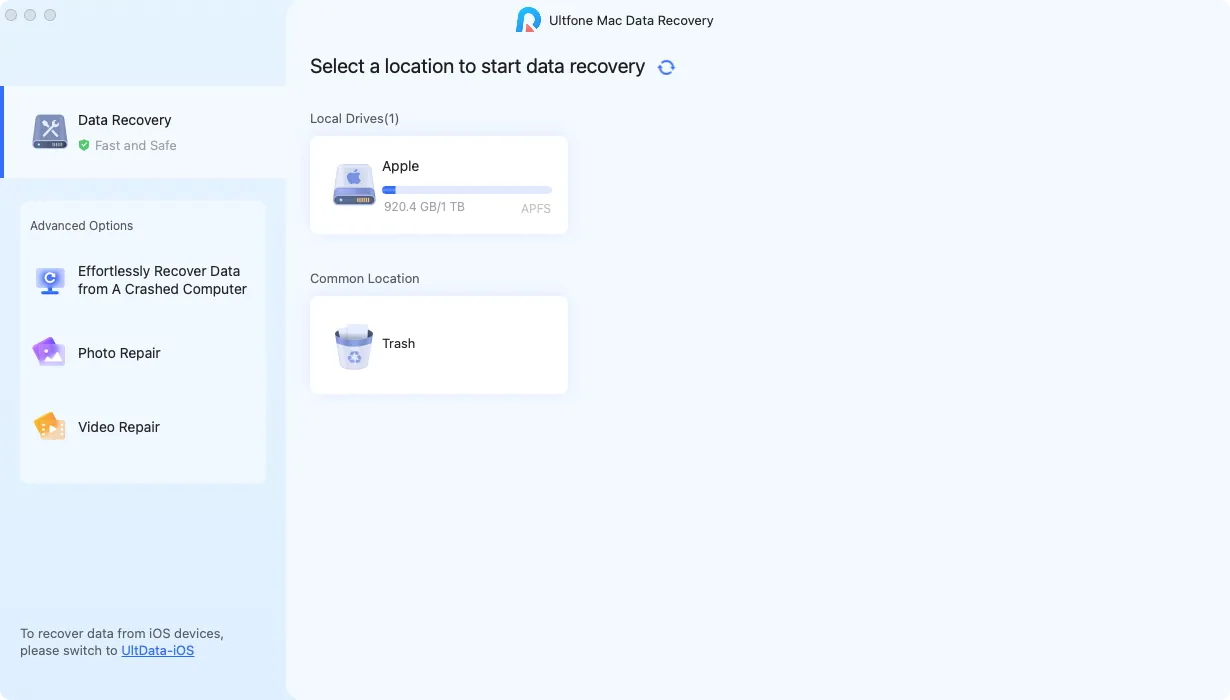
Note: If your Mac is macOS High Sierra and later, you will need to disable SIP first to allow access of Mac files. There is an onscreen prompts for your reference.

Step 2 Scan and Preview
It only takes a moment to scan all deleted data. In the tree view on the left column, you may find the files you deleted.
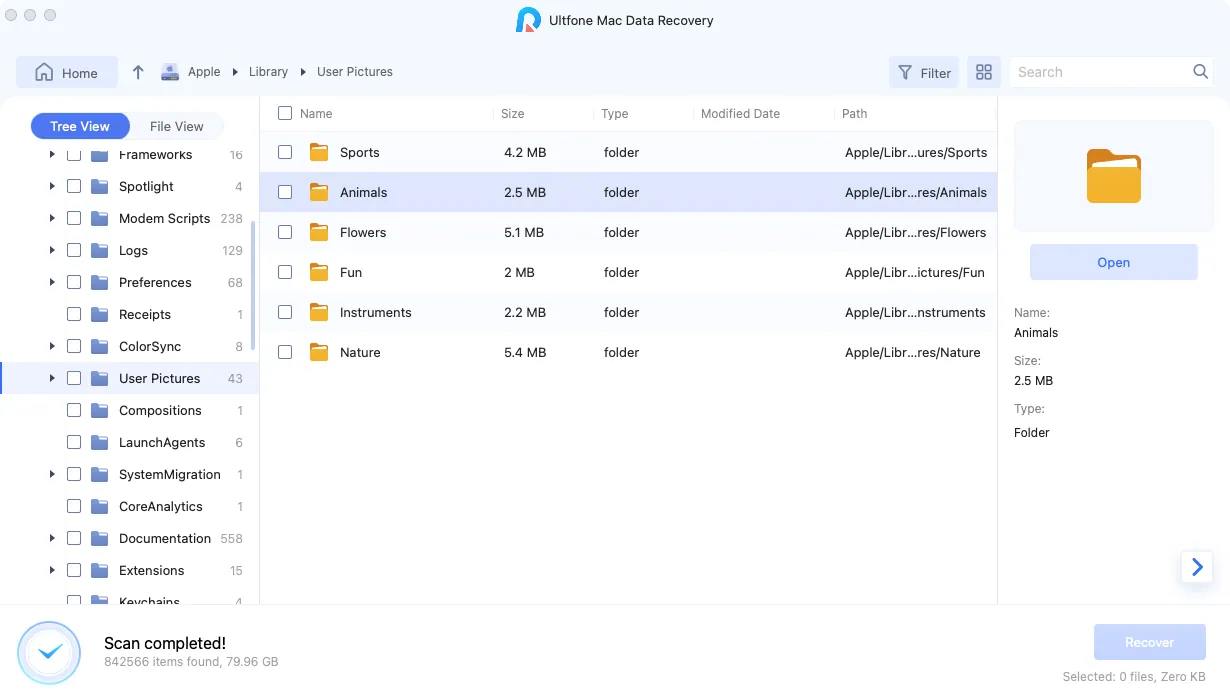
This application also supports File View preview.

You can preview every items in details, including name, path, creation date, changed date, size, etc.

Step 3 Recover Mac Files
Click Recover and choose a location to save the files you find. Saving the recovered files to the partition where you originally lost them is not advised. This is likely to cause permanent loss of your data.

Now you have successfully recovered the lost data on your mac!

Part 2 Recover from Emptied Trash
Step 1 Select a location
After installing UltFone Mac data recovery, run it on your Mac and select Trash.

Step 2 Scan and Preview
It takes a while to scan all deleted data. After the scanning result is generated, you can click on specific file types to preview more details.

Step 3 Recover Mac Files
Select the files you want to recover and click Recover button. Choose a location to save the files you find.

Part 3 Recover from Crashed Mac
Step 1 Choose Recover from Crashed System
In order to boot your crashed Mac and retrieve your data, get a working Mac ready, as well as a USB or external portable hard disk. After installation on a working Mac, click "Recover Data from Crashed Computer"> Scan.

Step 2 Create a Bootable Drive
When the bootable Mac's "Bootable drive" option appears, insert the USB drive and choose the one you just installed by clicking Start. You'll receive a notice prompting you to backup your data. A bootable drive will be created and the formatting procedure will start.

Step 3 Boot Mac and Recover Data
Place this bootable drive into the Mac that is stuck at the loading screen, then boot it while pressing the "Option" key. When you reach the plate selection interface, simply release the key and choose "UltFone Mac Data Recovery" to boot the disk circle. Currently, selecting "Export" will provide you access to the data.

Part 4 Repair Corrucpted Videos on Mac
Step 1 Select Video Repair
Launch UltFone Mac data recovery on your Mac after installation. Choose Video Repair from the Advanced Options.

Step 2 Add Videos to Repair
To import damaged or corrupted videos, tap "Click to add videos" or "Add videos," and then click "Repair" to begin the repair process.

Step 3 Preview and Export Repaired Videos
You can preview the corrected videos after they have been fixed, then select the ones you want to preserve and click "Export" to do so. Your corrupted or damaged videos have been successfully restored after exporting.

Part 5 Repair Corrupted Photos on Mac
Step 1 Select Photo Repair
Run the UltFone Mac data recovery software that you downloaded for free. Select Photo Repair from the Advanced Options.

Step 2 Add Photos to Repair
You can import damaged or corrupt photographs by tapping "Click to add photos" or "Add Photos," and then tap "Repair" to begin fixing them.

Step 3 Preview and Export Repaired Photos
After fixing them, you may select which photos to preview before clicking Export to save them somewhere secure. Your corrupted photographs are now successfully restored.
